Hello and thanks for stopping by my blog! There’s lots of content to check out here but I no longer post regularly. You can see my (very limited due to time constraints these days!) recent sewing on my Instagram feed.
Thanks!
Hello and thanks for stopping by my blog! There’s lots of content to check out here but I no longer post regularly. You can see my (very limited due to time constraints these days!) recent sewing on my Instagram feed.
Thanks!
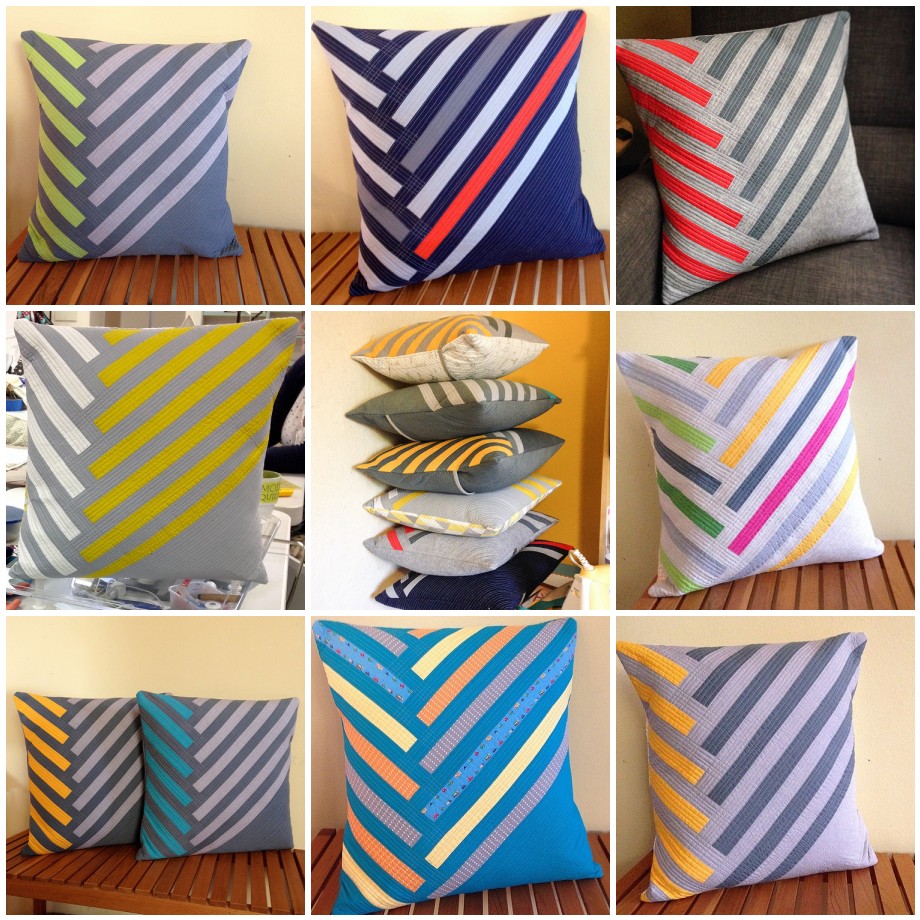
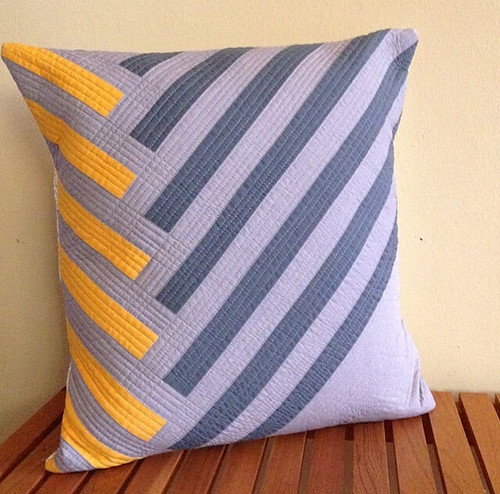
As promised I've put together the pattern for the pillows that I made at the end of last year... No excuses for how long it's taken me... I'm a busy lady! Obviously you can put these together in any number of color choices and options. I've made a pretty big variety:
In terms of fabric selecting, all I would suggest is that if you use a print have it be very small scale as the pattern of the design develops through the piecing and a loud print might detract from the overall look. I designed this pattern with solids in mind, so think of that when you pick your fabrics.
Materials needed:
Makes one 20" pillow.
Fabric: These quantities assume that you will be using three different fabrics. One for the background and one for each set of the lines. Since the design is made with a lot of 1.5" wide strips, scraps are great for this and you can feel free to mix and match any number of different colors and fabrics.
- Fabric A - Dark Gray (background): 15" x WOF (width of fabric) strip - Fabric B - Light Gray: 4.5" x WOF strip - Fabric C - Yellow : 3" x WOF strip
Pillow back fabric: - Two 20" x 13" rectangles of the fabric of your choice. I tend to use the background fabric to carry it through the design of the whole pillow. - One 20" x 2.5" strip for binding the exposed raw edge.
Scrap fabric for the inside of the pillow: -Two 22" x 15" rectangles -One 22" x 22" square
Batting: -Two 22" x 15" rectangles -One 22" x 22" square
One 20" pillow form
Cutting:
Fabric A:
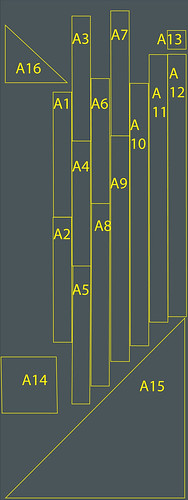
1. First cut your A15 triangle, measuring 15" up the right side of your fabric and cutting along the diagonal to the lower left piece of your 15" x WOF strip.
2. Use the remainder of your fabric and the diagram above to get all of your A pieces out of your 15" x WOF strip. A1, A2, A3, A4, A5, and A6 = 1.5" x 10" A7 = 1.5" x 11" A8 = 1.5" x 15" A9 = 1.5" x 18" A10, A11, and A12 = 1.5" x 21" A13 = 1.5" x 1.5" A14 = 4.5" x 4.5" A15 = Right triangle with both straight edges measuring 15" long A16 = Right triangle with both straight edges measuring 5" long.
Fabrics B & C: 3. Cut 1.5" wide WOF strips out of all of your fabric and trim down to the following sizes:
B1 = 1.5" x 7" B2 = 1.5" x 11" B3 = 1.5" x 15" B4 = 1.5" x 18" B5 , B6 and B7 = 1.5" x 21"
C1, C2, C3, C4, C5 and C6 = 1.5" x 10" C7 = 1.5" x 8"
Piecing:
This pattern is basically a quarter log cabin. It can get a touch confusing because two colors are assembled before you build the log cabin, but it's simple!
Piece with a 1/4" seam allowance.
4. Assemble the center as shown below. First sew A13 to B1. Then add on A14. Finish by adding C7 to your piecing.
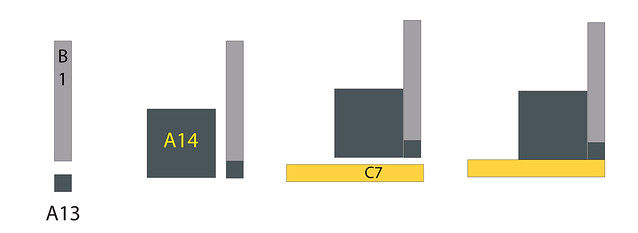
Now you'll assemble all of your strips in to panels before sewing them on to the center.
5. Start by assembling A1 with C1.
6. Continue making "yellow panels" by assembling A2 with C2, A3 with C3, A4 with C4, A5 with C5, and A6 with C6. Since all of the yellow panels are the same size, you don't need to label them.
7. Assemble A7 with B2 - label as A7/B2
8. Assemble A8 with B3 - label as A8/B3
9. Assemble A9 with B4 - label as A9/B4
10. Assemble A10 with B5 - label as A10/B5
11. Assemble A11 with B6 - label as A11/B6
12. Assemble A12 with B7 - label as A12/B7
13. Now it's time to start building the quarter log cabin on the center you already pieced. Working from side to side, add the piecing from steps 2 through 8 to your piecing as indicated in the diagram below. Start with A7/B2 and alternate between the yellow panels and the A/B panels.
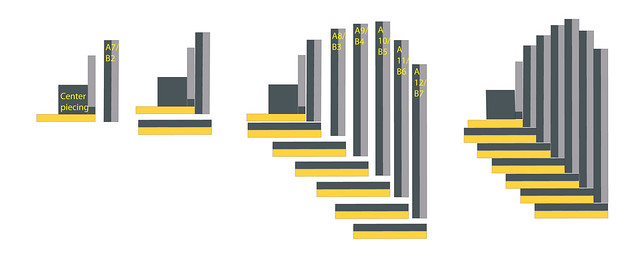
Please note: If this diagram is too small for you to see clearly, just click through to where it is on flickr since it is bigger there.
14. Now that you've built most of the piecing, rotate it and trim it down to 20" wide and 20" tall.
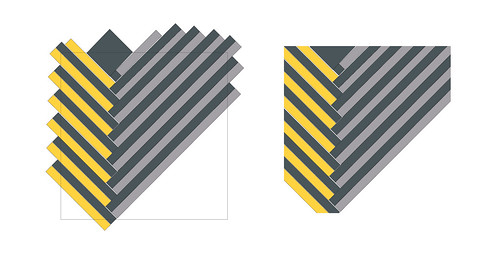
Trimming at this point makes it easier to see where your triangles get sewn on. Note that you'll just barely trim the bottom. Also, make sure that you have piecing to fill in all of the 20" wide before you make your first cut. You don't want to trim too much off of one side or the other!
15. Next, you'll sew the two remaining right triangles on to your piecing. They are intentionally a bit bigger than you need.
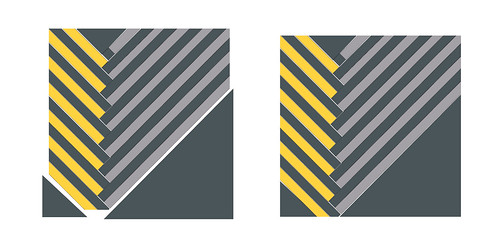
16. Finally, square up your piecing to a finished 20" square.
Finishing the pillow sleeve:
17. Now you'll need to layer your fabric, batting and scrap backing fabric and then quilt all three portion of the sleeve. The front, and the two 20" x 13" backing rectangles. I quilted these pillows with lots of dense straight line quilt 'cause that's my thing, but of course you can quilt as desired!
18. Once all three portions are quilted, trim off the excess scrap backing fabric and batting so that the front is 20" square and the two backing pieces are 20" x 13".
19. Bind the 20" length of one of the backing pieces.
20. Layer all three pieces, right sides together (taking care that your bound rectangle edge is what will be on the outside when you turn it all right side out) and pin thoroughly so that they won't shift as you sew them together.
21. Sew, using a 1/2" seam allowance, all the way around the outside edge of your layers.
22. You're in the home stretch! Trim your corners and turn the sleeve right side out and stuff with the 20" pillow form. Since the finished sleeve will be about 19" across, it will create a really full firm pillow.
23. And now the most important step: throw that pillow on your couch and enjoy it!!
Have questions or found a mistake in my pattern? (Totally possible!! Ha!) Let me know in the comments and I will reply as quickly as I can!

Today it's my stop on the Shimmer by Jennifer Sampou for Robert Kaufman Fabrics blog tour! What's that you say? A blog tour for a fabric line? That's right! You all know that I'm not one to use many prints, but I'm always up for the challenge. So when Jennifer Sampou reached out to me about being a part of the tour I said sure!
This line is filled with metallics so it's very appropriately named! I love the additional interest that the shine gives to the fabrics. I decided to dive in and sew up a quick pillow with them!
First I narrowed down the fabrics to my favs and of course threw in a lot of my beloved solids...
Some piecing and chopping lead me to some triangles. I love to work like this, with no plan in mind and just letting the fabric lead me where it does...
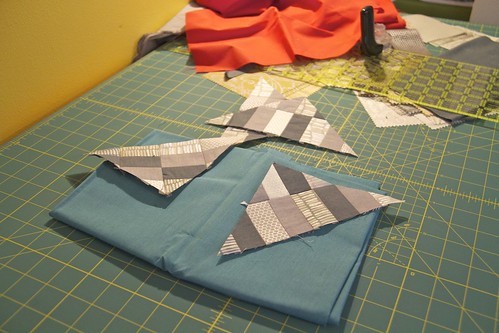 After messing around quite a bit with the options, I decided the orange-y red was wrong and some teal blue was right! I settled on a nice graphic line of the triangles, off set in the blue background.
A ton of straight line quilting later, and the pillow is all finished up!
Look at that Shimmer shimmer!
Do you want to win a charm pack of this fabric line? Just leave me a comment here and I'll pick a winner on Friday the 11th.
The giveaway is now closed and I have emailed the winner!
And you can also follow along with the rest of the blog tour:
April 1 - Robert Kaufman/Jennifer Sampou April 2 - Janice Ryan - Better off Thread April 3 - Me! Today! April 4 - Julie Herman- JayBird Quilts April 5 - Natalie Barnes- Beyond the Reef April 6 - Stash Books April 7 - Amanda Jean Nyberg- Crazy Mom Quilts April 8 - Lee Heinrich- Freshly Pieced April 9 - Cheryl Arkinson- Naptime Quilter April 10 - Christina Cameli- A Few Scraps April 11 - Elizabeth Hartman- Oh Fransson! April 12 - Faith Jones-Fresh Lemon Quilts April 13 - Gemma Jackson- Pretty Bobbins April 14 - Katie Blakesley- Swim Bike Quilt April 15 - Amy Smart - Diary of a Quilter April 16 - Laura Nownes, Jennifer Rounds, Pati Fried, Darra Williamson - See How We Sew April 17 - Holly DeGroot- Bijou Lovely April 18 - Jennifer Sampou - Wrap Up April 21 - Jennifer Sampou- Announce Winner of Giveaway FQ Pack of entire Shimmer Collection.
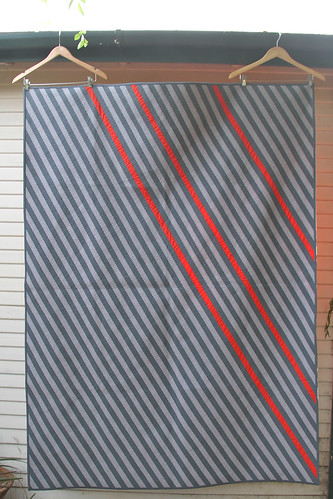
I put the final stitches in the binding of Bias 3 this weekend! I so enjoy getting a quilt finished up. And I am really in love with this one.
As my work has progressed I've tried to maintain the balance of working with minimalist design, yet keeping interest in the quilt. If I may say so myself, I think that I hit that note just right with this quilt and it's a place that I'll keep exploring.
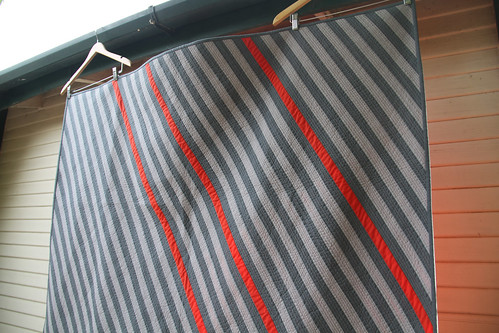
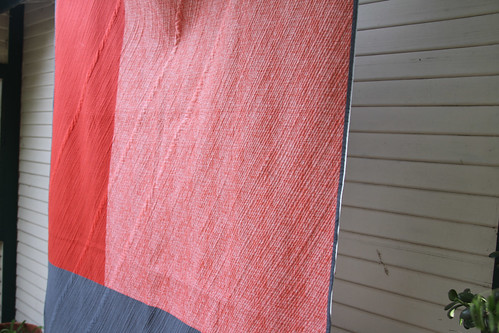
I did my usual straight line quilting on it - following the lines of the piecing. I left the red stripes unquilted to make them pop even more...
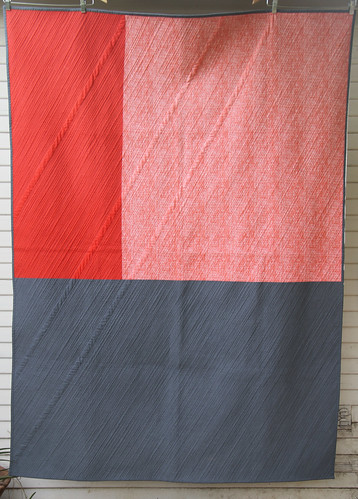
You can really see the quilting on the back!
Believe it or not, I'm gonna blog AGAIN this week so keep an eye out. Happy Monday!
Did you see the QuiltCon 2015 dates and teachers announcement? It's a year away but that'll fly by quickly!

Will you be going? I can't wait!
I got this quilt top finished up today. I am absolutely thrilled with how it came out.
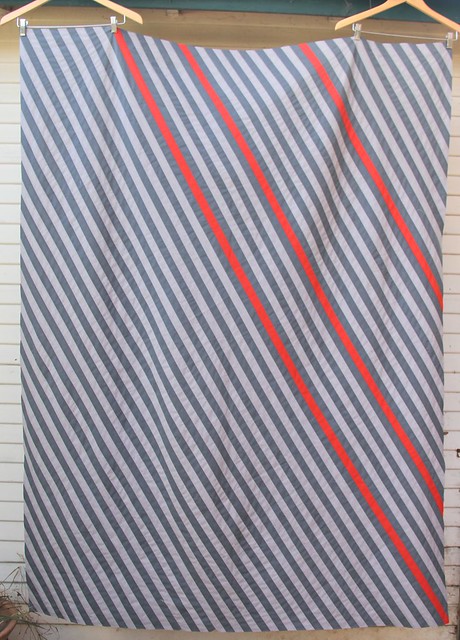
It's 60" x 75" and the longest stripes are 94" long. I knew when I came up with the design that I would need to work hard to keep the lines straight. I pieced the entire thing in my Modern Solids, and I'm so happy with how crisp and straight it came out.
I thought I'd show a few photos I took as I made it...
Pressing played a big role in the process... I pressed all of the seams open to keep it nice and flat.
Piecing this many 1 1/2" stripes was a bit nuts, but worth it in the end!
Once I'd finished piecing it all, I put it up on my design wall, drew on where to trim and squared it up! Here's a couple of pretty photos of it...
Oh and one bit of business! The winner of the copy of Quilt Improv is Christina. Congrats and I've dropped you an email.
Hope you are all having a fantastic weekend!
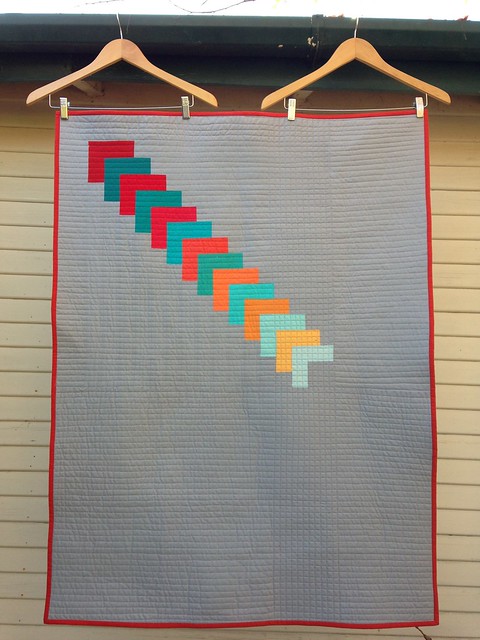
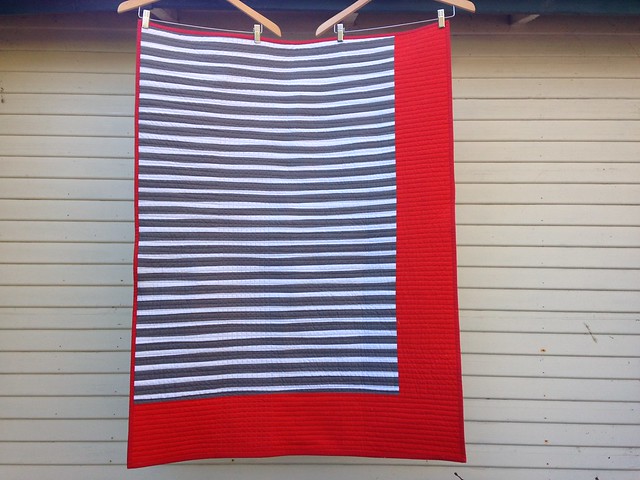
I finished up this little quilt a couple of weeks ago and you can now find the pattern for it over on Janome's website!
It was so quick to sew up - it would make a fantastic baby shower gift!
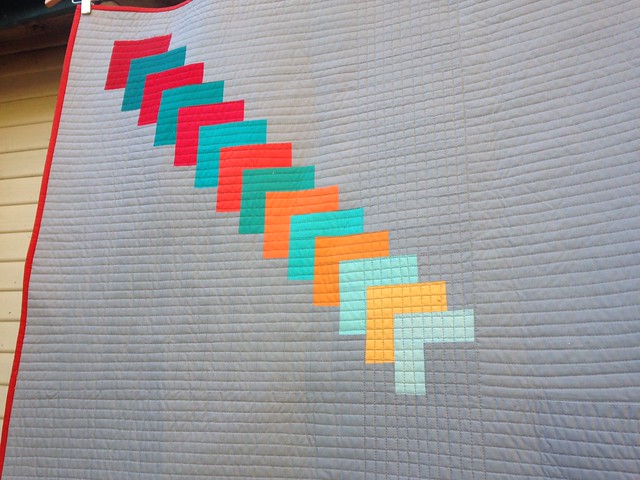
Here's the back:
I hope you make your own version of it!
Today is my stop on the blog tour for Quilt Improv by Lu Summers. Thanks for stopping by!
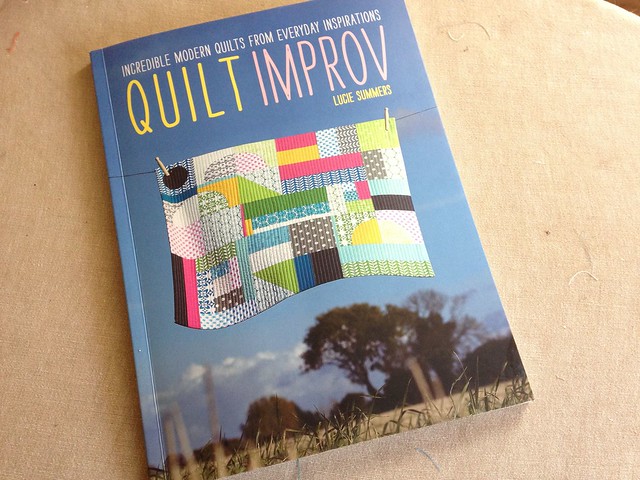
What a great book... To start with it's beautiful. The photography is bright and vivid with amazing out door locations. It makes you eager to dig into your stash and start sewing. But this book is more than a pretty face!
It is all about improvisational piecing, which is what made me fall hard for quilting back when I started. I think that all quilters, beginner or experienced, should try it. It opens your eyes to how free and fun quilting can be. Quilt Improv really embraces that concept of the freedom of improv piecing, but it is arranged so that the reader can learn specific blocks and techniques. This gives a great frame work in which to tackle improv piecing, making it approachable and fun.
First, the book teaches a series of blocks. They are all so colorful and bright, often sewn up with Lu's amazing fabrics. There's so much movement, life, and energy in her wonderful piecing!
Then, the book features a quilt for each block learned.
When looking through the book, I instantly fell for the quilt that features the improv string block. All those solids call my name of course!
Following Lu's thorough instructions I quickly sewed up the parts for a string block.
After arranging them a few different ways, I decided to make a change from the diamond and arrange them in this sort of broken stripe arrangement.
Since the whole point of improv is to add your own spin, I figure that's ok! This wonderful book really inspires and promotes creativity and exploration.
Who would like to win a copy?!? F & W Media is kind enough to be giving one so leave a comment here and I'll be picking a winner next Friday. And be sure to check out the rest of the blog tour!
Well. Here we are at the end of another year! 2013 was a rough year for many and that included me. There were some really wonderful moments (QuiltCon!!) but plenty of hard ones too. So I'm ready to move on from 2013 and tackle 2014! I am excited for all that it will hold! There HAS been sewing time over the past few weeks and that's been wonderful. I had really missed sewing machine time, so I found myself wanting to just sew without thinking too much. So I made the same damned pillow 9 (actually almost finished with a tenth!) times! Ha. I'll get the pattern put together soon!
And when I look at my 2013 sewing as a whole, I'm actually surprised that there is this much. It's nice to see it all together.
So here's to a New Year! Hope that yours is filled with love, family, friends and sewing!
It's so exciting, my fabric is in shops now! I stopped in at Sew Modern yesterday, and there it was!
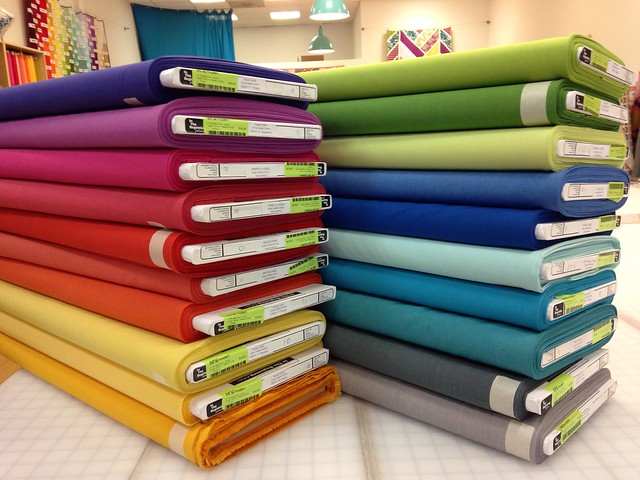
Snatch some up - I promise that you'll love them in person.
We're also having a holiday/release party at Sew Modern on December 13th!
Hope that those of you who are local to LA can come. Would love to see you there!
And guess what?? I've been sewing! A couple of posts about it are coming soon.
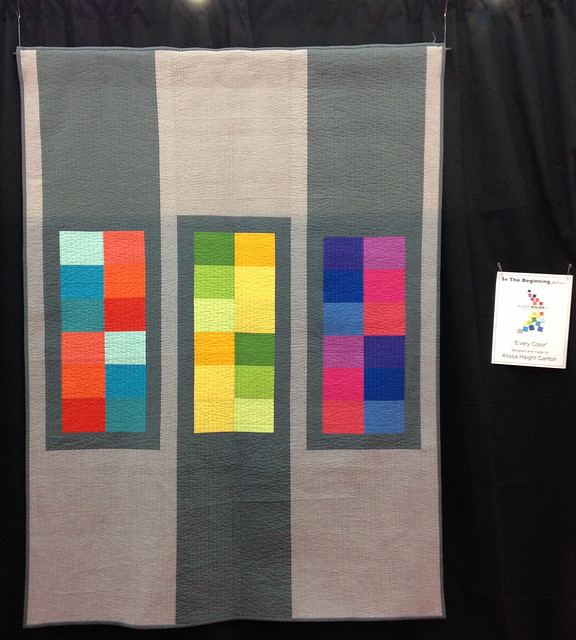
I am newly home from Quilt Market. It was a good one... Was great to see so many friends again. I had to make a quilt for the In the Beginning booth that featured all of my Modern Solids. Needless to say, it wasn't an easy task for me to come up with a quilt that had all of the colors, but didn't read too much like a rainbow. Here it is, hanging at Market, all finished up:
And a wider photo that shows it with the other two quilts featuring my fabrics.
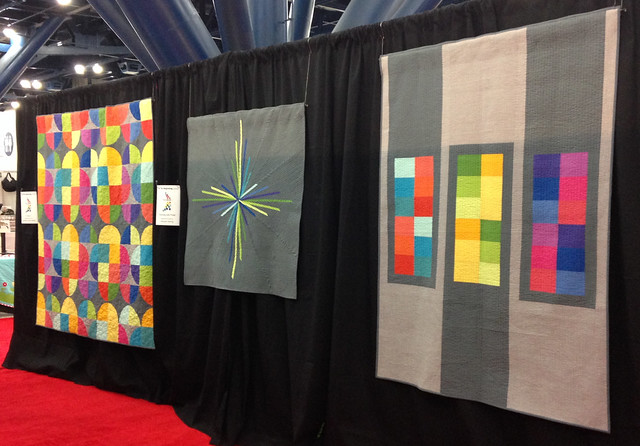
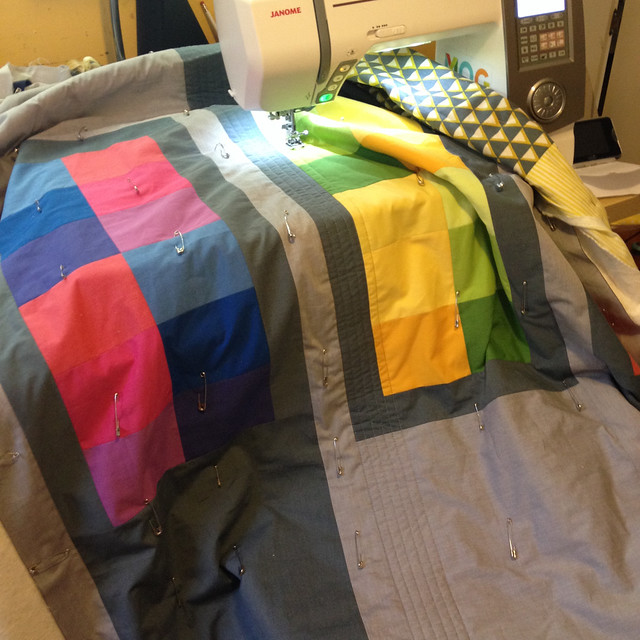
For the quilting I did straight line quilting across the whole face of the quilt (using the edge of my walking foot as a guide for each seam).
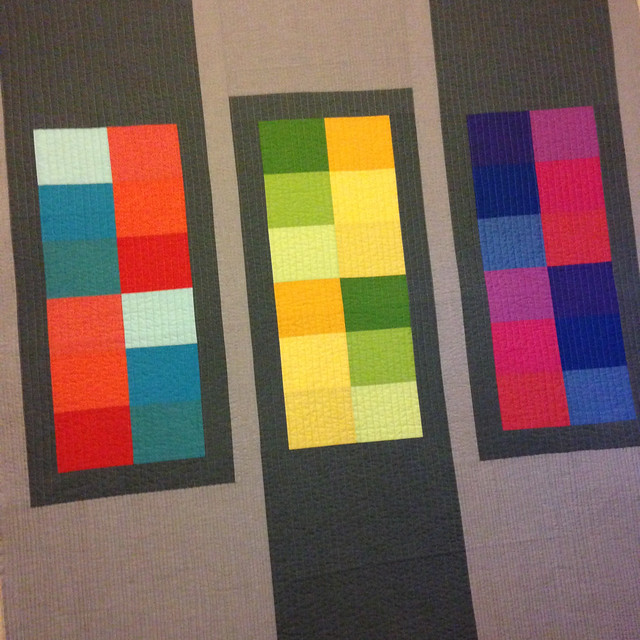
Then in order to accentuate the negative space, I went back and added another line between each line in the light gray.
I can't can't wait to keep working with my fabrics more! And I won't have to use every single color in the next quilt! There's definitely a certain satisfaction in sewing with your own fabrics. It's wonderful.
Another reminder that I'm over on Instagram more than I'm posting here... it's just so much faster! Please follow me over there if you'd like to!
You guys, I finally got my fabrics IN MY HANDS! For those of you wondering, they will be in shops in December and shops can currently buy them from In the Beginning. These solids are crossweaves, so they have a lovely texture and depth to them.
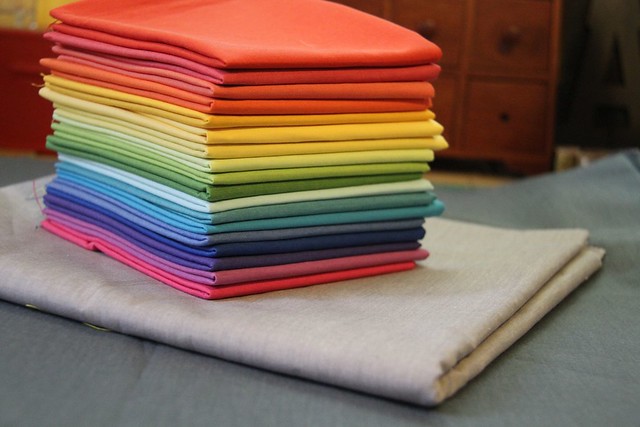
They are so pretty that I'm downright thrilled. These are all of the colors, plus the two grays on the bottom. I thought that I'd post a little about my process of coming up with the colors.
When I first spoke with In the Beginning about me releasing another line of colors with their Modern Solids, they told me about the process. The terrifying part of it is that since it's a crossweave fabric (that's not printed on) there's no test runs! You have to get the mill the colors of the two threads, they weave them and that's that! There's your fabric. No changes or tweaks allowed! Needless to say, when I opened up that box of fabrics, I was SO happy that I like them all.
So first up, I needed to decide on 20 colors... I spent a lot of time pulling fabrics and hitting up home depot for some paint chips!
Since the fabrics are cross weaves - the goal was to pick the two different colors of the threads that would add up to the desired finished color of the fabric.
First I settled on the finished colors that I wanted and then I slowly put together the two colors that would lead to it.
I put them all together and popped the little packet of colors in the mail!
You'll noticed a decided lack of purple. Yeah. I'm not so big on purple. I was understandably asked to add a couple so that was done and then the mill mailed us the threads.
They sent two shades of each color, so the vibrant ones were selected and off they went to weave 'em!! I held my breath for a couple of months while waiting and now that I have actually seen them and felt them, they are beeeeeautiful!!
Seriously. I'm not just saying this because I work with In the Beginning now... these fabrics are wonderful to work with. The drape and hand... the nice crisp flat press... and they cut so smoothly. They are just really lovely fabrics...
I definitely picked my favorite colors, but I also did my best to pick colors that I think will really appeal to the modern quilter. I hope you like them too!
What, you say?? Alissa doesn't work with prints - how could she be doing fabric?!? Well I'm releasing a line of solids!!

When I received the first round of Modern Solids by In the Beginning Fabrics I instantly fell in love with the drape and hand of the fabric. They are a cross weave so they have a richness and depth that other solids don't have. I found myself wishing that I could work with this exact fabric, in all of my favorite colors.
So I took a chance and went to talk with In The Beginning Fabrics about the idea of my own line of solids. And what do you know? It worked out! So I will be launching this line of fabrics at Fall Market. I'm so thrilled about it and can't wait to start sewing up a ton of things with these beautiful fabrics.
I'll be certain to post all about them here about them as soon as I get my hands on 'em!
This year together we raised $11357.50 for Action Kivu!! Thank you so much to everyone who supported the fundraiser! We didn't get to our goal (the numbers are eye opening about the state of blog reading.) but this is money that Action Kivu needs to keep running and we've made that happen!! So THANK YOU! While the fundraiser is now over, Action Kivu always needs your help. You can give on their website.
I'll be drawing the winners today and emailing them directly. Thanks again for everyone's support!!
Here it is! The very last day of the Action Kivu Fundraiser! Oh and what's that?!? You've been meaning to give but you haven't yet? Now is the time!
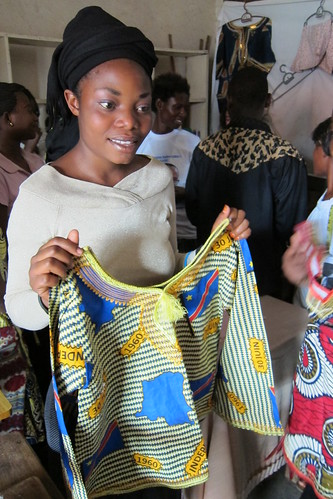
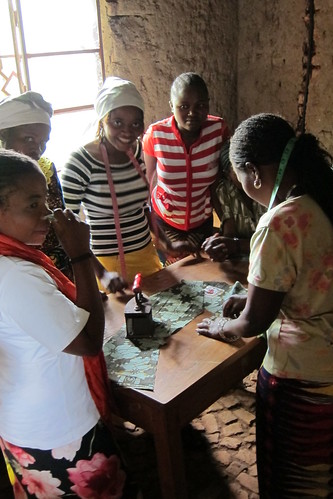
You could win great prizes if you give! Also, please tweet, Facebook or generally spread the word in any way you can today! Let's raise as much as we can for this great organization!! Women and children in Eastern Congo need our help.Please give $10 if you can, or $500 if you can! Thank you!
 The Action Kivu Fundraiser is now over but Action Kivu ALWAYS needs your help. Please give on their website!
And like that, another year has come and gone and it's time for the 4th annual Action Kivu fundraiser! Today is the FINAL first day of the fundraiser, held here on my blog, through this week. The fundraiser will end, and the giveaways will close, on Monday the 19th of August at 11:59 pm, Pacific time.
For those of you who are new to my blog, here’s the lowdown: there are lots of great giveaways involved in this fundraiser and together we do a lot of good!
If you read my blog, you know about Action Kivu, but for those of you who don't know, Action Kivu is a nonprofit that helps women who are victims of the conflict in Eastern Congo by teaching them to sew at a sewing workshop. Action Kivu also pays for children to go to school and supports other programs for women that provide them ways to support themselves and their families. The conflict in Congo has taken the lives of over 5.4 million people since 1998. Rape is used as a weapon of war, with estimates putting the number of rapes in the hundreds of thousands. These are horrible statistics but together, year after year now, we have made a difference for some specific women and children. Here we are, year four of this fundraiser and the conflict in Eastern Congo is still happening. But that's all the more reason for us to really do all we can this year. Please give all that you can!
Another way you can help is to please tweet, post on Facebook & Instagram or blog about the fundraiser - help us get the word out!
Part of what's great about this fundraiser is that we know exactly where this money goes. Action Kivu is run by my twin sister and a good friend. They have been to Congo and have met many of the specific women and children who are helped by this fundraiser. The more money we raise, the more we help!
Last year we raised an amazing $17,500! This year we’re shooting for $20,000 and together we can get there!! The American staff of Action Kivu is 100% volunteer, so all of your donations, minus nominal banking fees, go directly to the work on the ground, empowering and educating the women and children of eastern Congo.
See that thermometer on my side bar? (click through if you’re seeing this in a reader) Let’s get it movin’ up and up and up! This online sewing world is so giving! Let’s pool that generous nature that is in all of us and make a real difference in the lives of some women and children who sincerely need our help. Please give today!
So here’s how it works:
In order to be entered to win a giveaway, all that you have to do is give the amount assigned to that prize. Can’t decide which giveaway you want to be in the running for? You can enter more than one! Just donate the dollar amount associated with a prize and you’ve got a chance to win it. However, you can only enter each giveaway once.
Ok - let's get to the prizes!
Added Prize on Wednesday the 14th! If you give $25 or more, please comment over on the Sew, Mama, Sew blog and you'll be entered to win a $25 gift certificate to their book shop!
Added Prize on Thursday the 15th! If you give any amount please comment over at Jacquie's blog and you'll be entered to win a copy of her great book! Added Prizes on Friday the 16th! Give $25 or more and be sure to comment over on Ashley's blog and to be entered to win a selection of out of print Heather Ross fabrics (pieces from her Mendocino, Lightning Bugs and/or West Hill lines)!
Give any amount and head over to Craftbuds to be entered to win 10 fat quarter set of Riley Blake Chevrons, and Olfa Ergonomic Rotary Cutter and Coats & Clark Dual Duty thread!
$15 Donation:
Donate $15 and be entered to win three quilting books! My two books, Block Party and Modern Minimal and a great collaborative book I'm proud to be in called We Love Color.
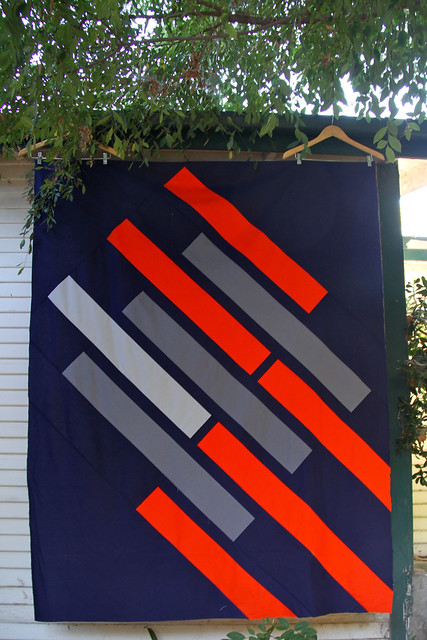
I'd designed this one in Illustrator a couple of weeks ago. It was very quick to sew up once I got started.
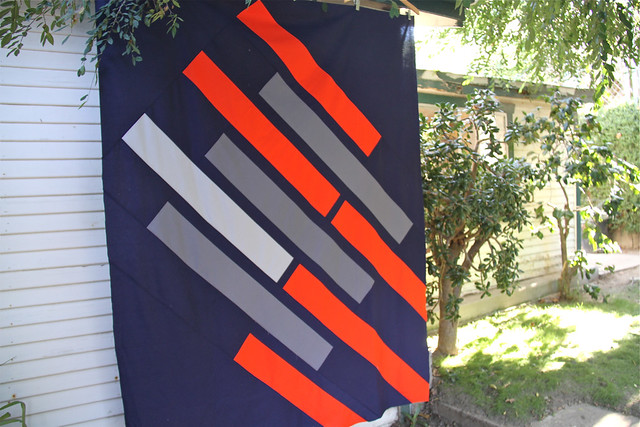
The only step that's a bit more difficult is squaring up the bias piecing.
But I put the finished piecing up on my design wall, mark where I want to cut and then I cut away. Admittedly it would be really hard to do on a quilt that's too big for my design wall. This 60" x 75" large throw pushed the limits!
I can't wait to quilt this one - the quilting is going to add so much to it.
One another note - check back here Monday because I'll be launching my 4th Annual Action Kivu fundraiser! Can't wait to see you then.
My very good friend Heather, who I work with very closely for the MQG, is holding a fundraiser and I wanted to help to spread the word a bit. The fundraiser is to raise money for LeyoMyoSarcoma research, a rare cancer (you can read about it here) that Heather was recently diagnosed with. Heather is a do-er and an incredibly strong person, so she's tackled treatment head on and is now working to raise money for research for this cancer.
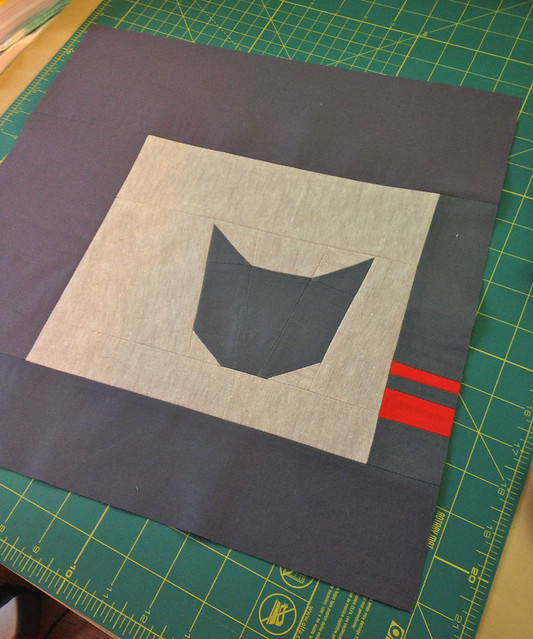
A group of us made Heather a quilt when we learned of her cancer. If you know her at all, you know she's a huge fan of all things cat related. We instantly knew that a Cat Quilt was in order. But a MODERN Cat Quilt?? Eek. I'll admit the challenge was scary to me! All I had to deliver was one block though so I dove in and came up with this:
And here is Heather with the quilt all finished up!
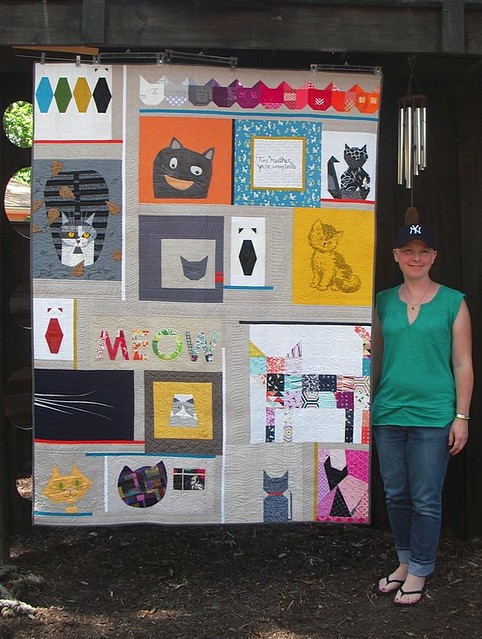
Elizabeth assembled the blocks in to the top and Angela added her beautiful quilting. It's a fantastic quilt for an even more fantastic woman.
Can you spare a few dollars for her fundraiser? If so, please give!
I was lucky enough to teach up at A quilters Affair and then go to the Sisters Outdoor Quilt Show. Elizabeth and I also spoke at the Save it for Sunday event. The whole thing was great. I love Los Angeles, but I grew up in a town of 2000 people so it's always really, really nice for me to spend time in a small town. Sisters, Oregon is so beautiful!

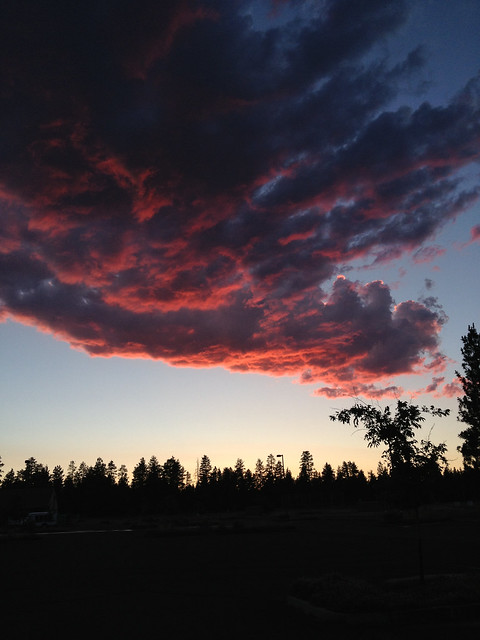
It's the type of place where you're teaching and you look up to see this!
Pretty fantastic.
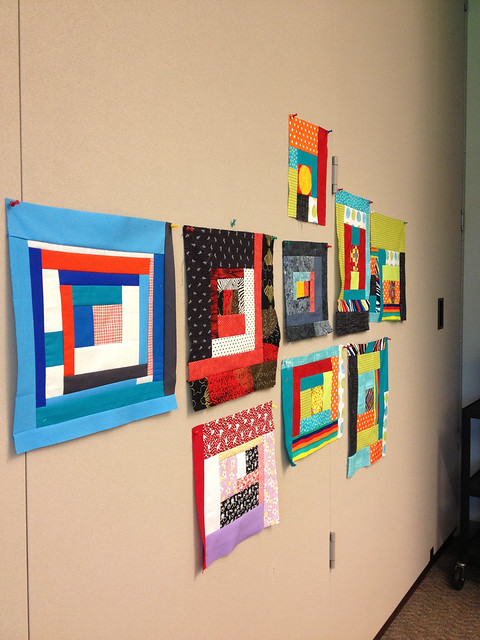

My students sewed up tons of great work...
The show was fantastic and I had a couple of quilts hanging in the teachers' tent.
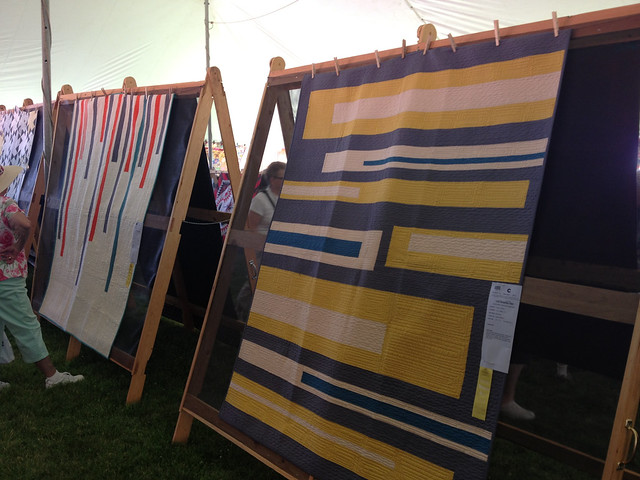
And there were a few of my quilts hanging in the Save it for Sunday show.
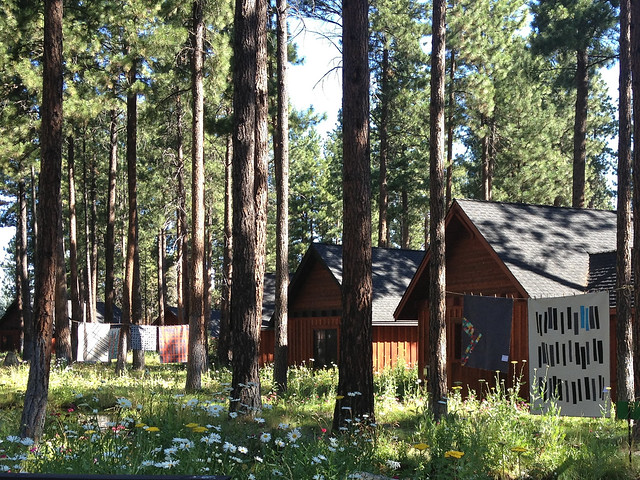
It was such an amazing venue. The trees and wildflowers...
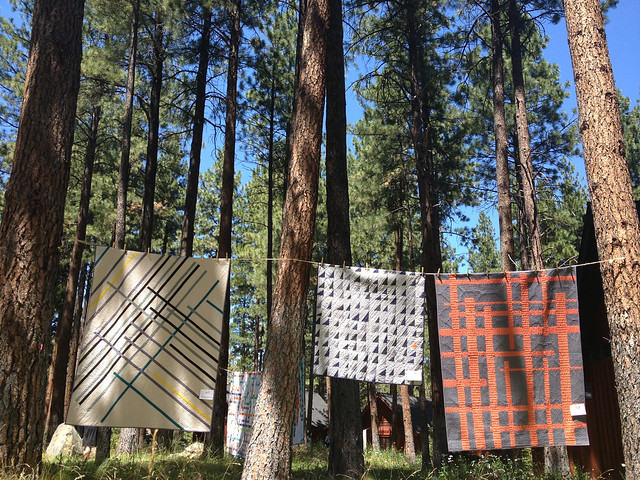
It was just so, so lovely.
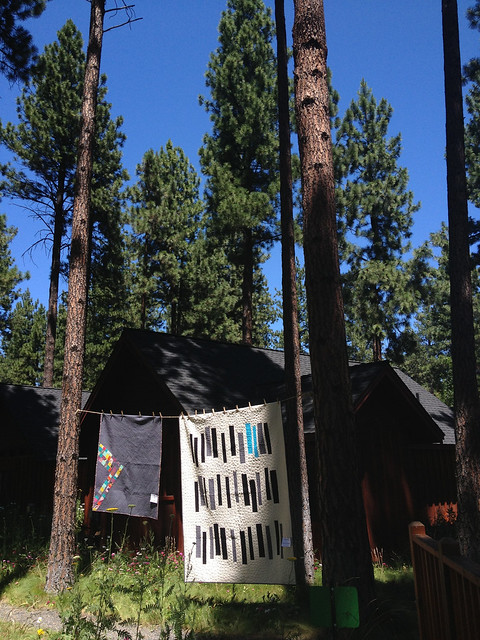
I was so lucky to spend the week there. It was a truly wonderful time filled with teaching, quilting and friends!
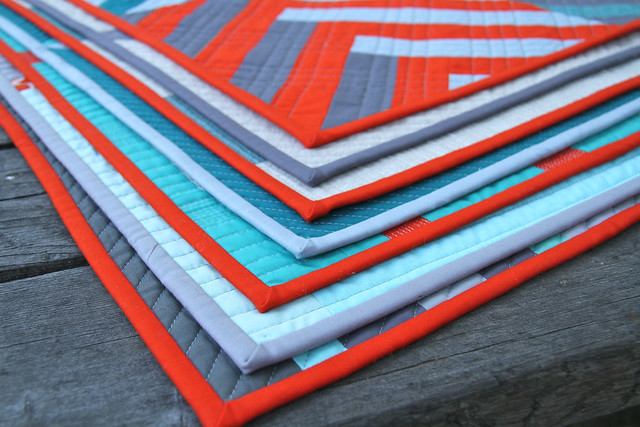
I just spent the last week up in Sisters, OR for a week of teaching at the Quilters Affair and the Sisters' Outdoor Quilt Show. It was an amazing week and I'll get a blog post about it written up soon. Meanwhile, I thought I'd post all of the mini quilts that I sewed up for my various class samples.
A few are made up of blocks from my Modern BOM over on Sew, Mama, Sew and the others are from blocks in Block Party.
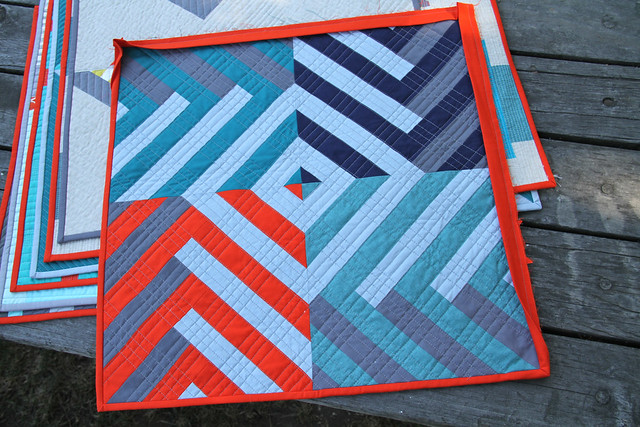
This is a my January block, sewn up with three fabrics, rather than four. (Yes, I still needed to finish stitching the binding when I had time to snap these photos.)
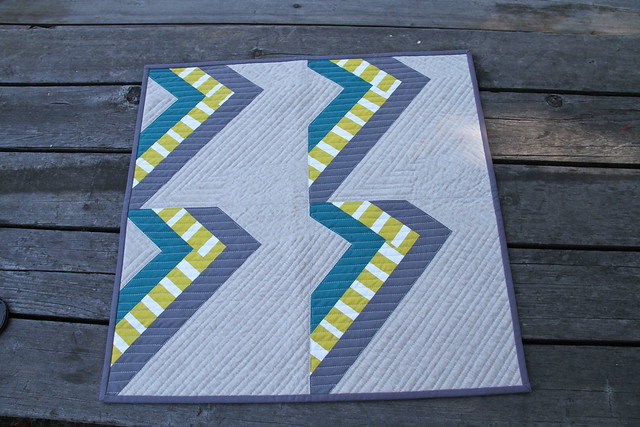

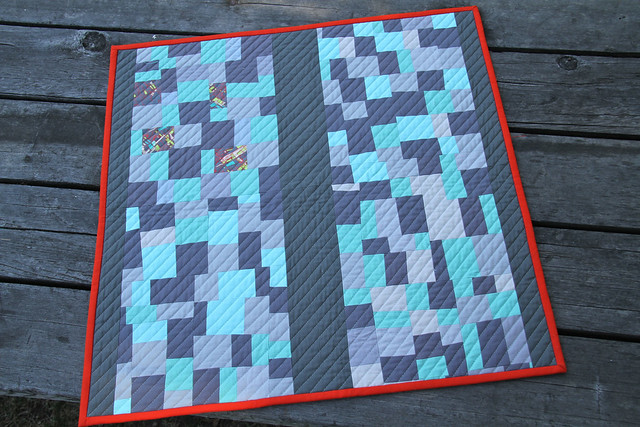
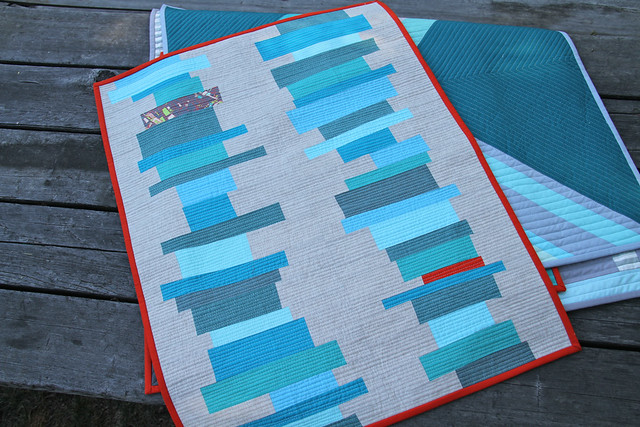
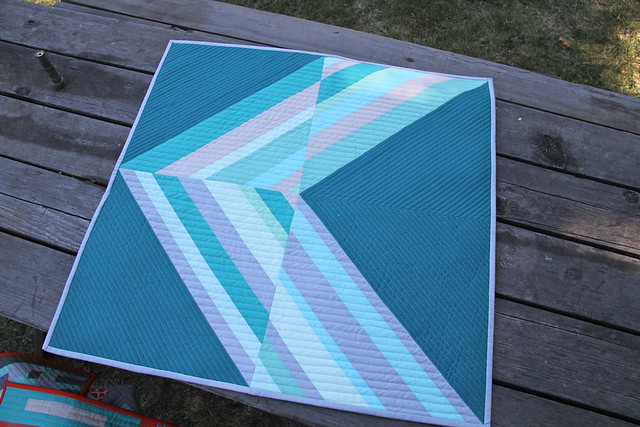
It was so much fun to work with these blocks again and be able to get some quick projects sewn up. Lots of work to sew up so many, but it was great to be able to mix and match with colors and my usual use of solids. Now, what to do with so many minis??